Materials
The first thing you will require is pigments. As I explained in the introduction, it is possible to create a painting using very few colours. In fact, if you want to experiment with the technique without investing in a large number of colours, you could work with only two. Titanium White and Raw Umber would be a good choice in this case. However, if you want to try a broader spectrum, a few other earth tones (the Siennas, the Umbers, Yellow Ochre, Iron Oxide Black) are a good place to start. And to expand further on this set, I would also recommend Chromeoxide Green, Ultramarine Blue, Cadmium Red Middle, and Cadmium Yellow Light or Lemon. I will go into more detail about pigments and their various properties later. You don't need to start with this many:
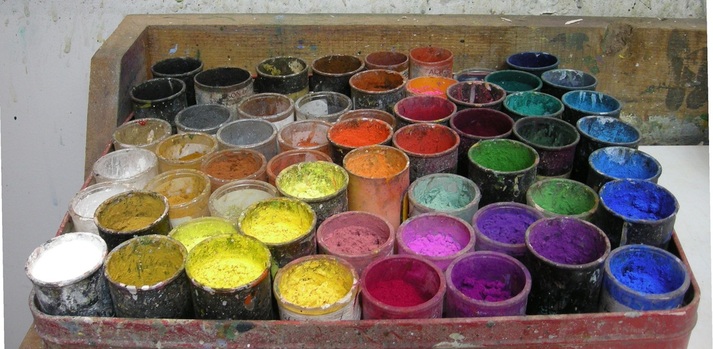
Biscuit tin holding plastic containers of pigment
As you can see, these pigments are dry. What you might not be able to see from the photo is that they contain no fillers. They are exactly the same pigments that good paint manufacturers use to make watercolours, oil paints, and acrylics. If you were to add water to them, they would turn into what looked like paint. But without a proper binder, the pigments would revert to their powder state when dry. This means that they would simply fall off the painting.
In egg tempera, the binder used to hold the pigment to the painting is egg yolk. With this technique, the mixture you make with one yolk will last for three painting days, as long as you keep the mixture that isn’t on your work table in the refrigerator. So if you’re painting all week, count on using two or three eggs.
The only other ingredient is water. Some artists are fastidious enough to use only distilled water, but I find that regular tap water works just fine. Any impurities in it will be so diluted that they will not make a difference. Unless your tap water is actually red with iron, I wouldn’t worry about using it to make paint.
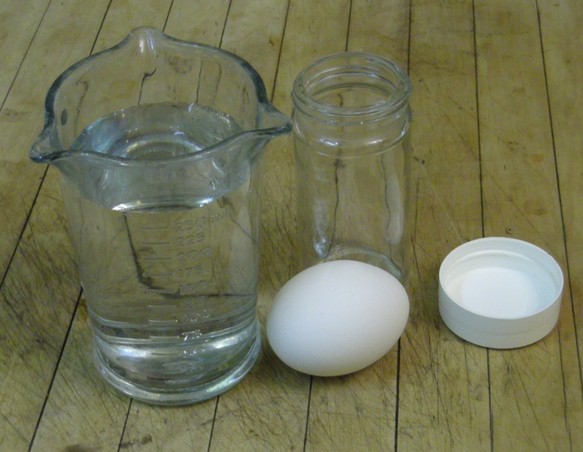
So that’s it: egg, water, pigments. It’s very simple.
Equipment
To make egg tempera you will need:
• A small, watertight container for mixing the egg yolk and water, about 75 mL.
• A small saucer to hold the egg yolk mixture
• A jar for rinse water
• Small plastic containers to hold the dry pigments, and something to put them in (a biscuit tin or shoe box with the sides cut down would be perfect)
• At least one palette. I recommend the porcelain, daisy-style palette with deep reservoirs, but you can use any convenient container that has separate reservoirs (such as a plastic egg carton). It should, however, be white so that you can “read” the mixed colours correctly.
• Paint brushes. I recommend having a variety of shapes and sizes. You will discover that the size of the brush is less important than its quality. A good point on a large, round brush can make a finer line than a poor point on a small brush. If you are used to painting in watercolour, you will find that egg tempera is harder on brushes than watercolour, so you might not want to sacrifice your Kolinsky sable. Synthetic brushes work just fine, but try to buy ones with a good spring. Spend as much as you can and experiment with a variety until you find ones that feel right in your hand. If you can only afford one or two brushes, you will still be able to make a beautiful painting.
• A rag or paper towel for wiping your brush
• Water soluble pencils for drawing (graphite or charcoal); charcoal sticks for tracing
• Optional: an empty jar or tin can for holding your brushes upright while they are not in use
Lastly, of course, you need something to paint on. It is a widely held belief that egg tempera must be painted on a gessoed, inflexible panel. However, I have successfully applied it to heavy, hot-pressed watercolour paper for three decades, and I have run into no problems with cracking or lifting. As long as the finished work is framed properly, preferably under glass, there is no reason to avoid painting on paper. In fact, I recommend it as a good way to learn the technique since the first few layers will be absorbed into the surface of the paper. You are less likely to experience lifting, which is the bane of the egg tempera painter. I will write later about ways of avoiding this – and dealing with it when it does happen.
If you want to work on panel, there are two ways to go. You can make a traditional rabbit skin glue gesso, which is cooked in a double boiler, applied warm in many layers, allowed to cool and dry, and sanded to a smooth finish. It is absorbent and very fine. You can fix a fine muslin cloth to the panel with the first layer of gesso, and this will help to stabilize the surface Or you can purchase prepared panels. The latter must be prepared with an absorbent surface. Acrylic gesso will not do. Egg tempera needs an absorbent surface. I like Claybord panels made by Ampersand. The perfectly smooth white surface is made with kaolin clay, the main ingredient of porcelain. These panels come in standard sizes, but I have successfully cut the uncradled variety with both a table saw and a jig saw. If you put masking tape over the section to be cut, you will find that there is very little chipping along the saw line. They do tend to warp slightly during painting if uncradled, but they are easily restored to their original shape when framed. If this bothers you, purchase the cradled panels, which will hold their shape during the painting.
I highly recommend using an easel. Since egg tempera is not applied in a wash like watercolour, it is a good idea to keep your painting vertical while working. First, after hours of painting, your neck and shoulders will feel better than if you are bent over a table working on a horizontal surface. Second, your ability to see the painting properly won’t be impaired by the distorting effect of perspective. You can raise and lower the painting on an easel so that the section you are working on is at eye level. If you don’t have the space or budget for a full size easel, a small tabletop easel is an affordable alternative.
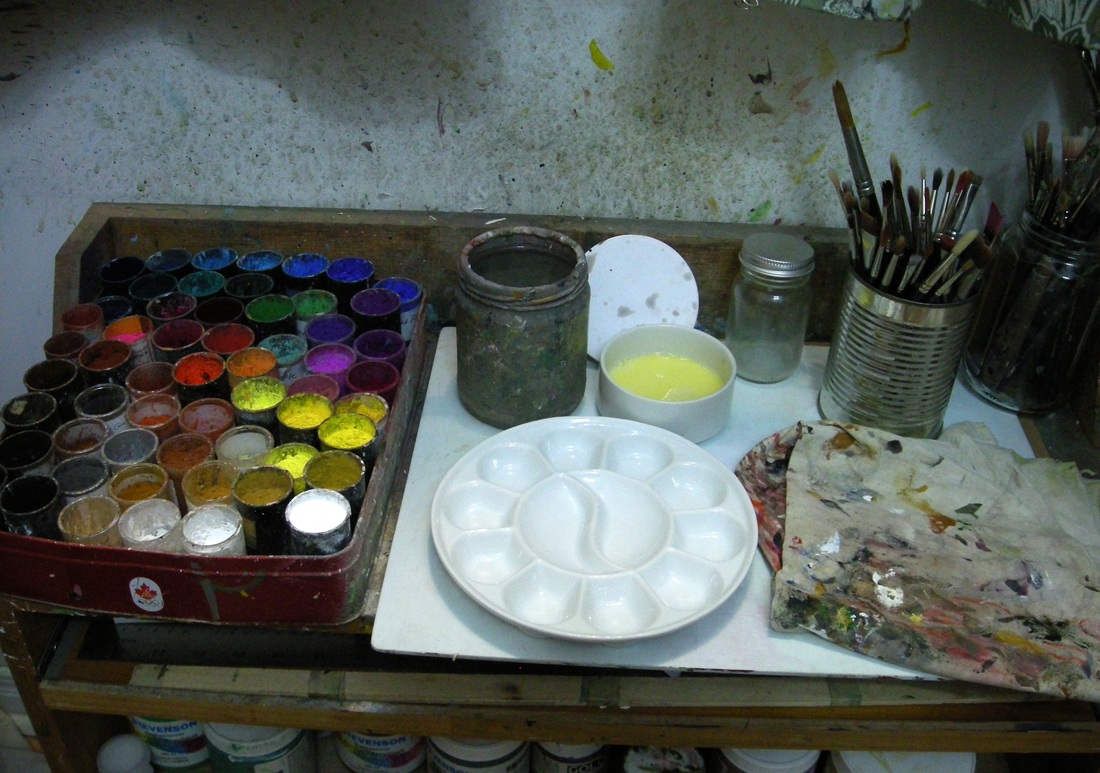
Work bench set-up
You should have a low table or bench to put your palette, rinse water, and other materials on. Don’t keep your paints so high that you can’t look down into the containers and see what you have. A comfortable height is probably slightly higher than the seat of your work chair.
And, lastly, a note on seeing: make sure that your work area is properly lit. Some artists are fanatical about working with only natural light. But this isn’t always possible. Since I like to work at all hours, I have found that a balance of lights (fluorescent, halogen and LED) on a track keeps my studio bright and usable at any time of the day or night. I also keep two pairs of reading glasses for stacking on my nose. This creates a comfortable level of magnification so that I can see exactly what my brush is doing. I have used a magnifying glass on a metal arm, but this is less satisfactory. Just make sure that you can see properly.
You don’t need a huge studio to make egg tempera paintings. Mine is 2.5 metres square. You need something to support your painting, a place to set your materials, and a comfortable chair. Once you have these, all you need is time – and lots of it.
